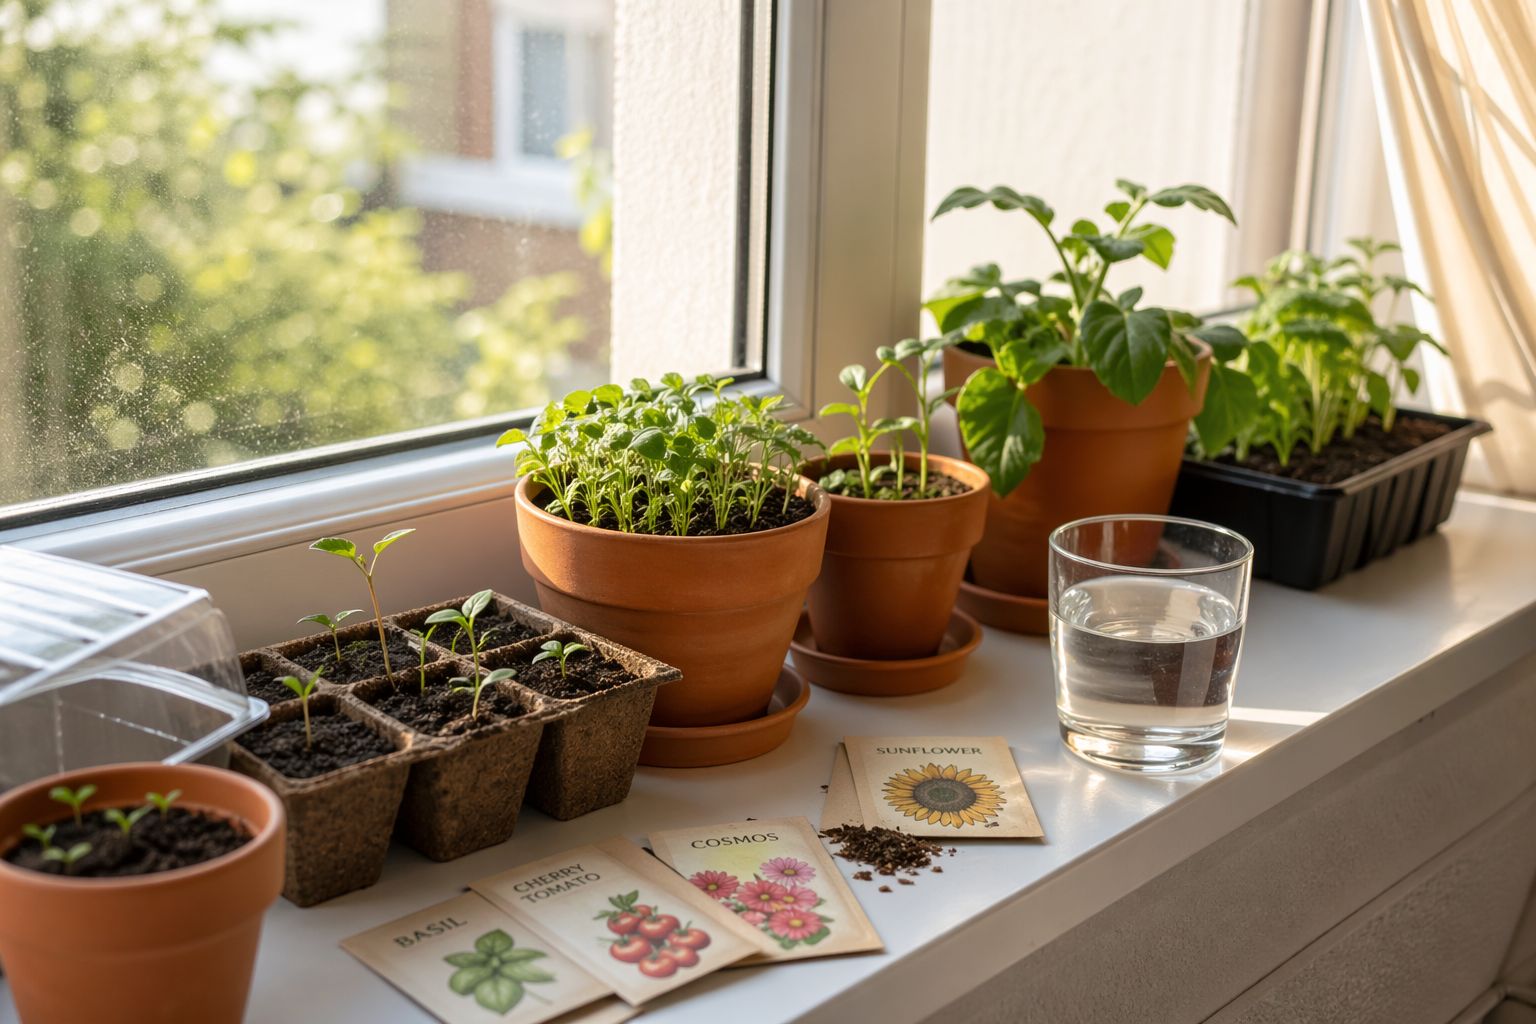
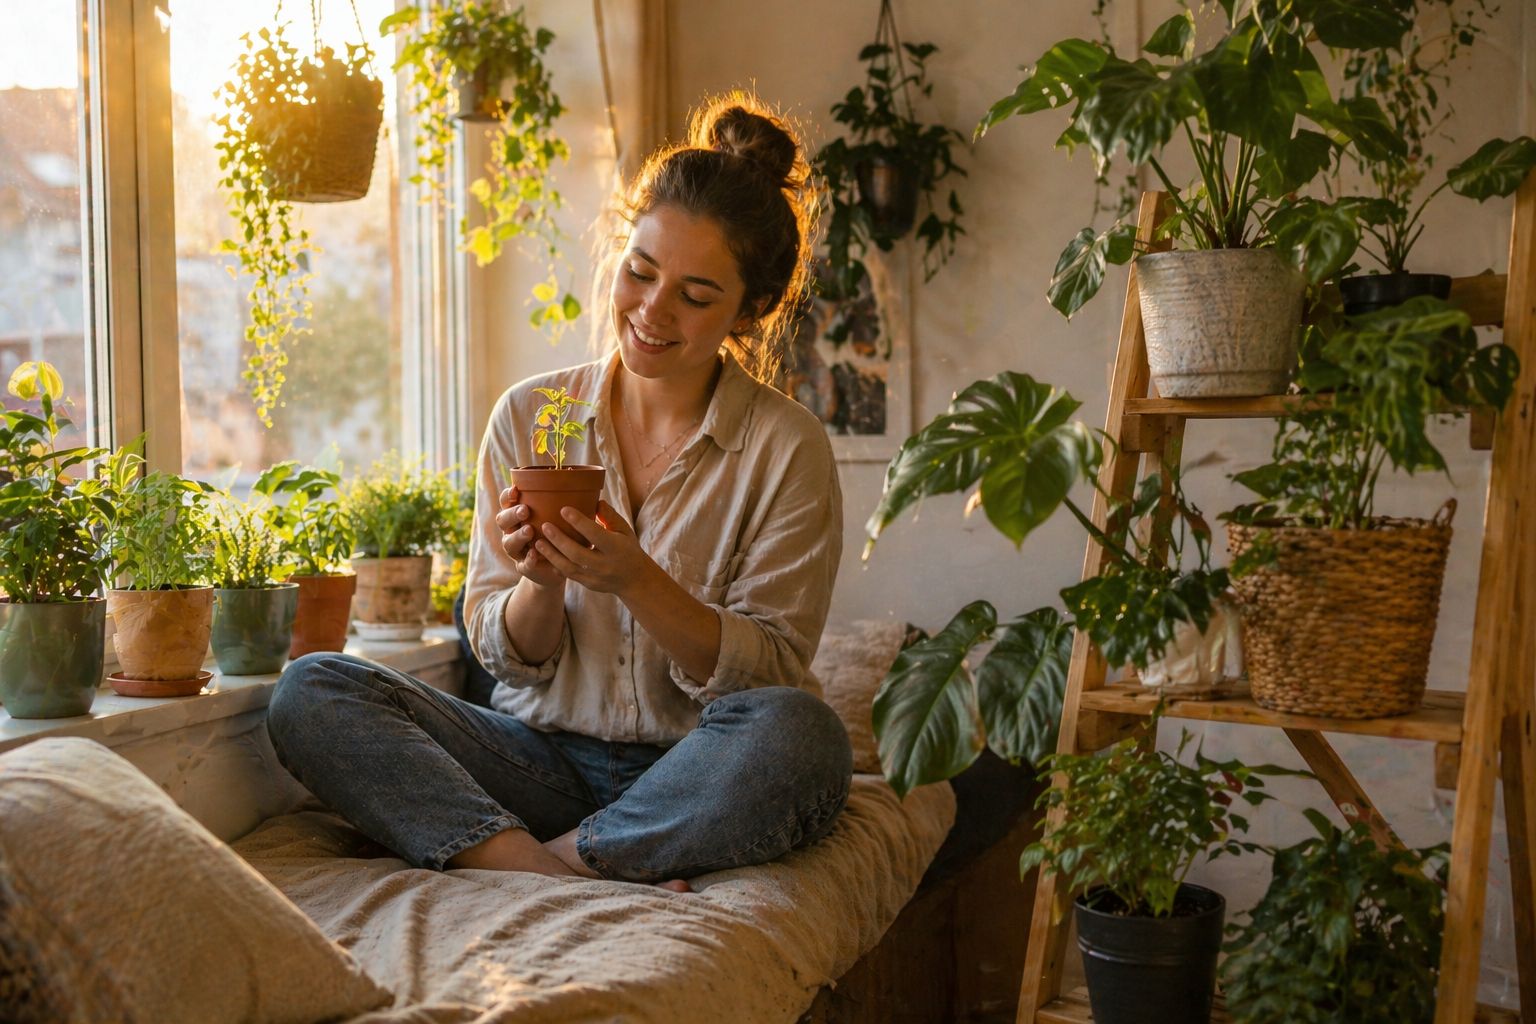
Whether you have a sunny windowsill or a spare corner with a grow light, growing plants from seed indoors is one of the most rewarding things you can do at home. This guide walks you through every step — no experience needed.
Why Grow Plants from Seed Indoors?
Most people buy ready-grown plants from a nursery. And that's fine. But growing from seed is a completely different experience — and a deeply satisfying one.
Here's why thousands of home growers are starting from seed:
- It's cheaper. A packet of 50 seeds costs less than one nursery plant.
- More variety. Nurseries stock maybe 20 types of plants. Seed catalogs carry hundreds.
- You control everything — the soil, the environment, the care — from day one.
- It's genuinely fun. Watching a tiny seed crack open and push its first leaf toward the light never gets old.
Whether you want lush tropical foliage, fragrant herbs on your kitchen counter, or colorful blooms year-round — this guide will get you there.
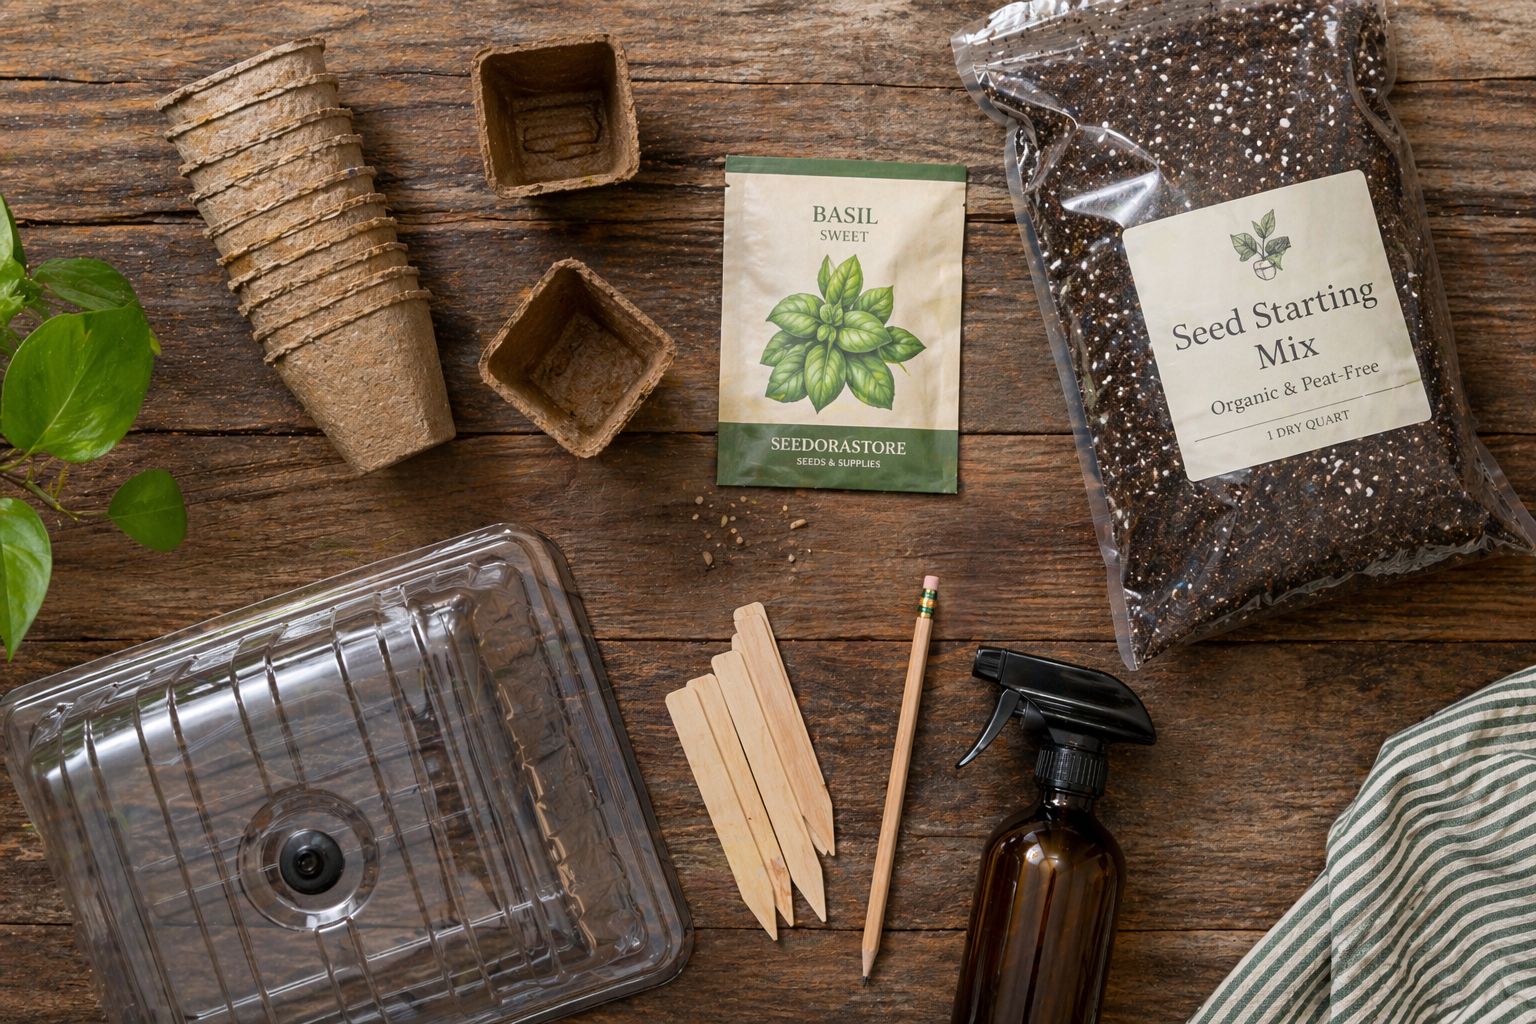
What You'll Need Before You Start
Before you plant a single seed, gather your supplies. You don't need anything fancy — most of this is available at any garden center or online.
Seeds
Choose seeds labeled "easy to grow indoors" or "beginner-friendly." Great first-time choices include:
| Plant | Why It's Great for Beginners |
|---|---|
| Basil | Fast germination (5–7 days), aromatic, useful |
| Pothos | Nearly impossible to kill, thrives in low light |
| Marigold | Colorful, quick-sprouting, forgiving |
| Tomato (cherry) | Rewarding, grows well in containers |
| Lavender | Slow but stunning, loves sunny windowsills |
| Snake Plant | Extremely low-maintenance, air-purifying |
💡 Seedora Tip: At Seedora, every seed listing includes a detailed grow guide written specifically for first-time indoor growers. You'll know exactly what to expect — germination time, light needs, watering frequency — before you even open the packet.
Essential Supplies Checklist
- Seed starting mix (NOT regular potting soil — more on this below)
- Seed trays or small containers with drainage holes
- Clear plastic dome or plastic wrap (for humidity)
- Spray bottle for misting
- Grow light OR a bright south-facing window
- Labels and a marker
- Small watering can with a gentle rose head
Step 1: Choose the Right Container
Your container is your seed's first home. It doesn't need to be expensive — but it does need to be right.
What works well:
- Dedicated seed trays (plastic, 6-cell or 12-cell)
- Biodegradable peat or coir pots (these go straight into the ground at transplant time)
- Recycled yogurt cups or egg cartons (punch drainage holes in the bottom)
- Small 3–4 inch plastic pots
The one non-negotiable rule: drainage holes. Seeds sitting in waterlogged soil will rot before they ever sprout.
Container depth matters too. For most seeds, a container 2–3 inches deep is plenty for germination. You'll transplant to a larger pot later.
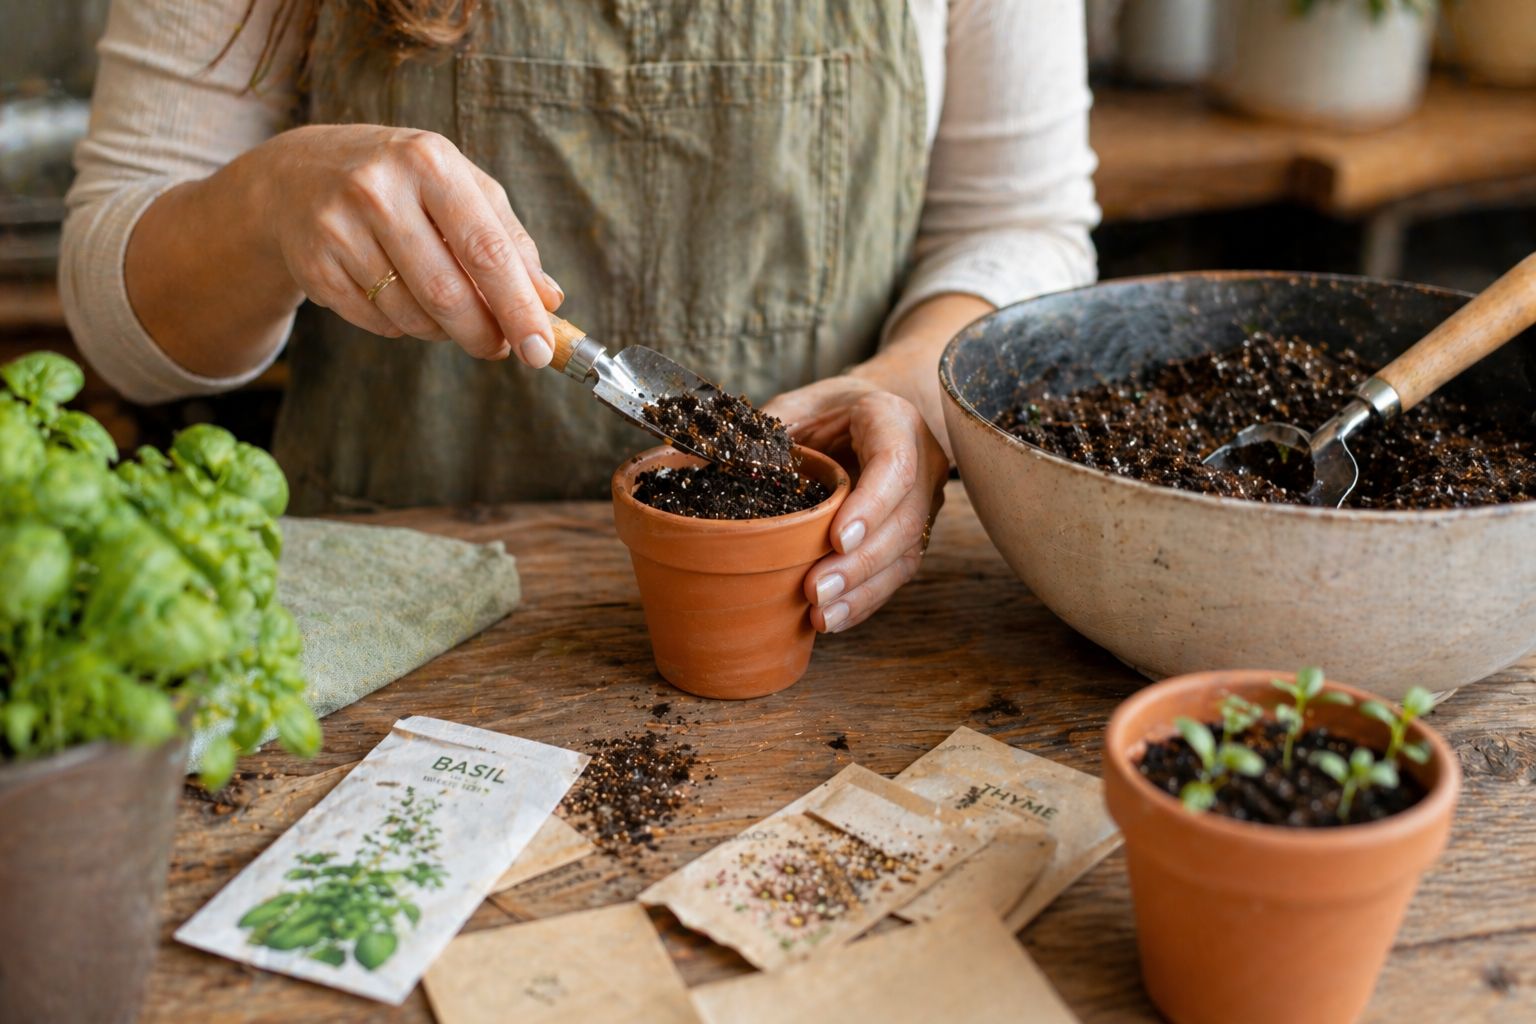
Step 2: Use the Right Growing Medium
This is where many beginners go wrong. Regular potting soil is too heavy for seeds. It compacts easily, retains too much moisture, and can prevent tiny seedlings from pushing through.
Instead, use a seed starting mix — a lighter blend typically made from:
- Fine peat moss or coco coir
- Perlite (for drainage and aeration)
- Vermiculite (holds just enough moisture)
Seed starting mixes have no added fertilizer. That's intentional — seeds carry their own food supply inside them. They don't need nutrients until their second set of leaves appears.
How to prepare your mix:
- Pour seed starting mix into a large bowl
- Add water gradually and mix until it's damp — like a wrung-out sponge
- Fill your containers to about ½ inch from the top
- Gently firm the surface (don't pack it down hard)
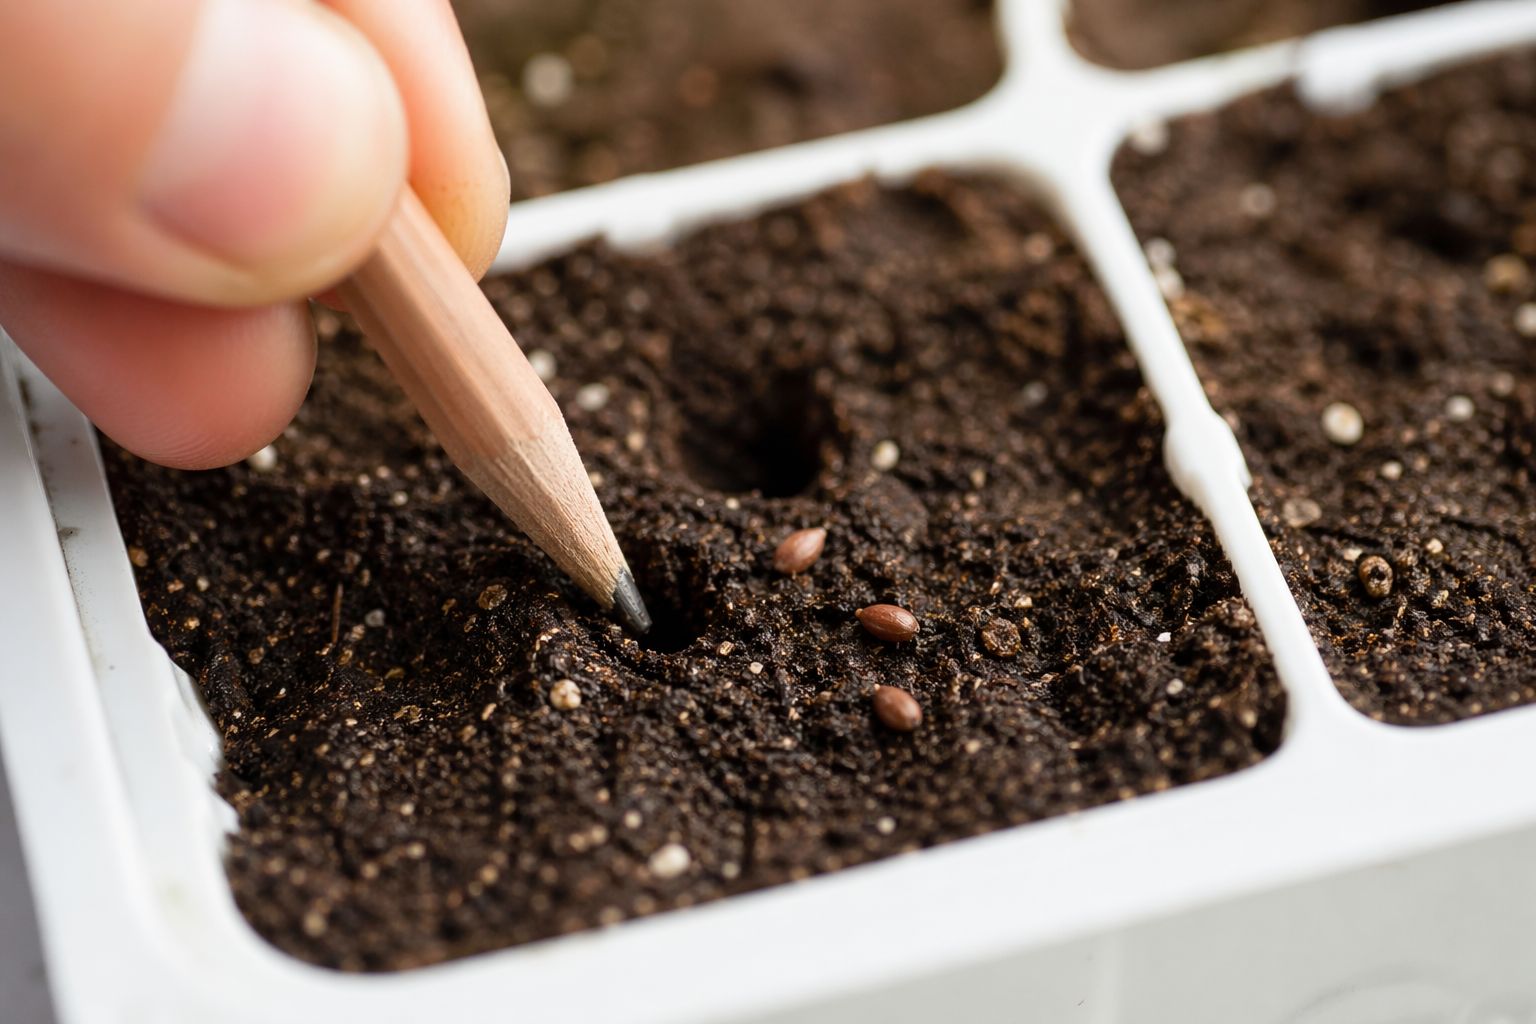
Step 3: Sow Your Seeds
Now the exciting part. Read the seed packet carefully — it will tell you:
- Planting depth (most small seeds are sown ¼ inch deep or less)
- Spacing (how many per cell or pot)
- Special instructions (some seeds need soaking, scarifying, or cold treatment first)
General Sowing Method:
- Make a small indentation in the center of your prepared soil — use a pencil tip or your fingertip
- Place 2–3 seeds per cell (you'll thin to the strongest one later)
- Cover lightly with a thin layer of mix — just enough to block light (unless the packet says "surface sow")
- Label immediately. Memory is unreliable when you have six identical trays.
- Mist gently with your spray bottle until the surface is evenly moist
🌱 Rule of thumb: Plant seeds at a depth equal to 2–3 times their diameter. Tiny seeds (like basil or petunia) barely need covering at all.
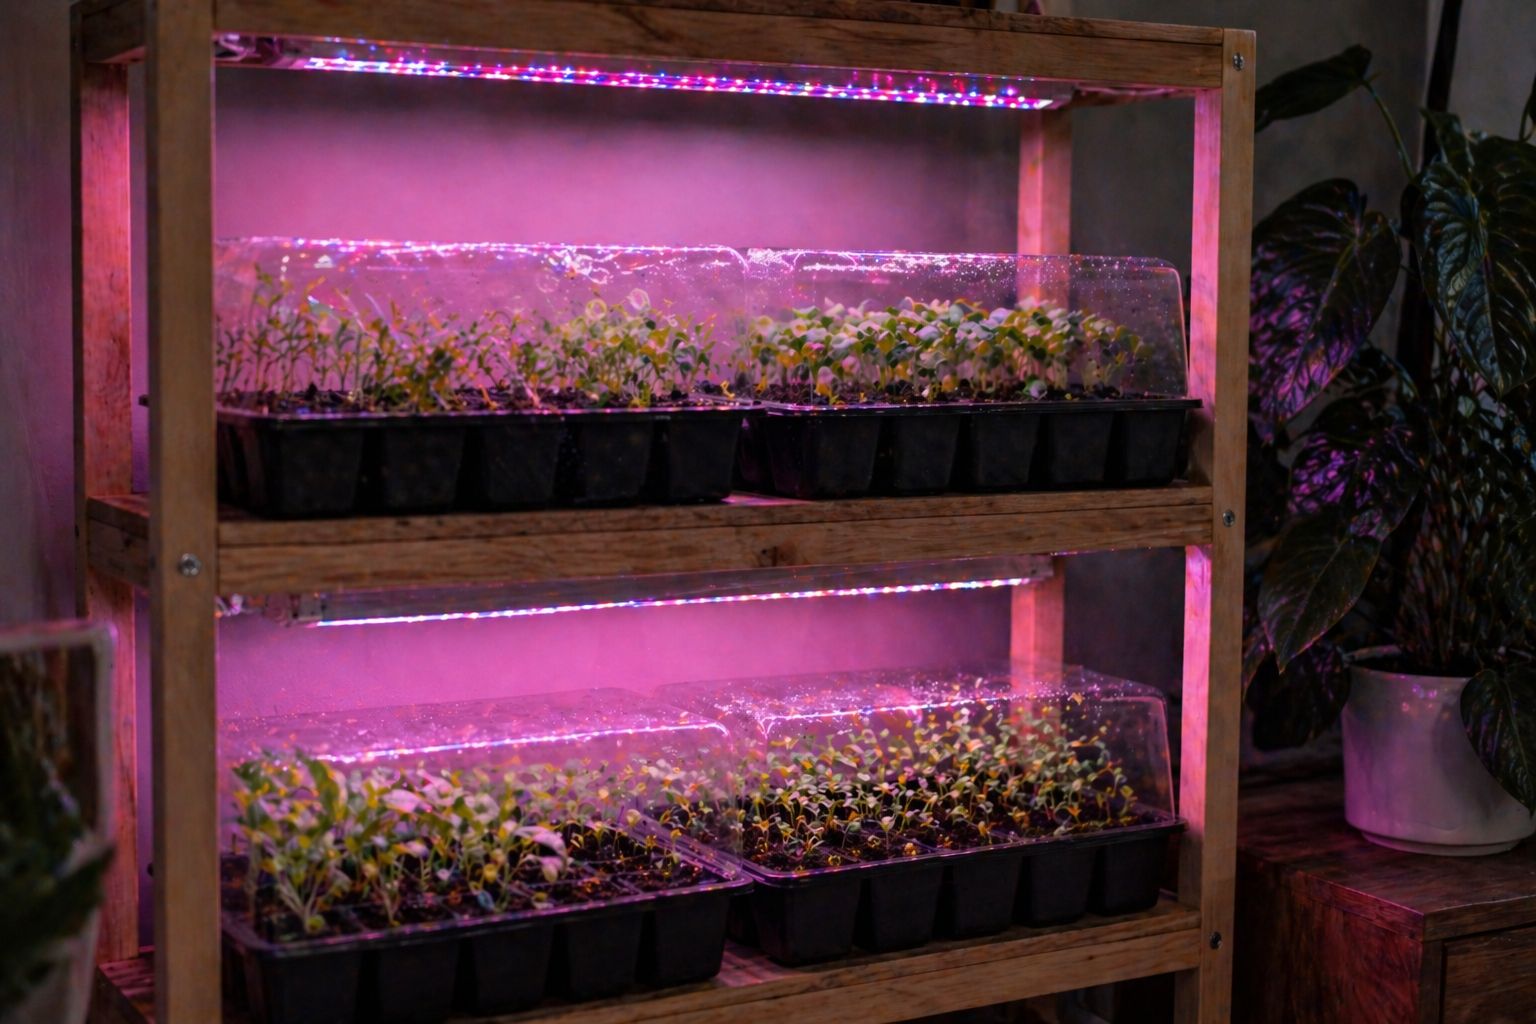
Step 4: Create the Right Germination Environment
Seeds don't need light to germinate — but they do need warmth and moisture. Your job right now is to create a mini greenhouse effect.
Warmth
Most seeds germinate best between 65°F–75°F (18°C–24°C). If your home is cool, consider:
- Placing trays on top of the refrigerator (warm from the motor)
- Using a seedling heat mat (very affordable, big difference in germination speed)
- Putting trays near (not on) a radiator
Humidity
Cover your trays with a clear plastic dome or loosely tent with plastic wrap. This traps moisture and creates the humid conditions seeds love.
Check daily. If condensation builds up heavily on the inside of the dome, lift it briefly to allow fresh air in.
No Light Yet
Until you see green sprouts emerging, light is not a priority. Focus on warmth and moisture.

Step 5: Watering — The Most Important Skill
Overwatering kills more seedlings than any pest or disease. Here's how to water correctly at every stage.
Before Germination
- Water only with a fine mist spray bottle
- The goal: keep the surface consistently damp, never soggy
- Check twice daily — humidity domes help reduce how often you need to water
After Sprouting
- Switch to bottom watering: pour water into the tray beneath your containers and let the soil soak it up from below. This encourages roots to grow downward and keeps the surface drier, preventing damping off (a fungal condition that kills young seedlings at the soil line).
- Let the tray sit for 20–30 minutes, then drain any remaining water
Signs You're Overwatering
- Soil stays wet for more than 2 days
- Seedlings fall over at the base (damping off)
- Yellowing lower leaves
- Mold on the soil surface
Signs You're Underwatering
- Soil pulls away from container edges
- Seedlings look wilted in the morning (not just midday)
- Leaves feel papery
Step 6: Provide Light After Germination
The moment you see green shoots breaking the soil surface — remove the humidity dome and move your seedlings to their light source.
Natural Light
A south-facing window is ideal. Your seedlings need 6–8 hours of direct or bright indirect light daily. Rotate trays every few days so all seedlings get equal exposure.
Warning sign: If seedlings are leaning dramatically toward the window, or their stems are very long and thin (a condition called "etiolation" or "leggy growth"), they're not getting enough light.
Grow Lights
For most indoor environments, a full-spectrum LED grow light is the most reliable option. Place it 4–6 inches above seedlings and run it for 14–16 hours per day using a timer.
💡 Seedora recommends: Starting with a simple clip-on LED grow light. They're inexpensive and make an enormous difference in seedling health, especially in winter months or apartments without bright windows.
Step 7: Thinning Your Seedlings
If you planted 2–3 seeds per cell (as recommended), you'll likely have multiple sprouts competing for space. This is normal — and now it's time to thin them.
Why thin? Crowded seedlings compete for light, water, and nutrients. Thinning is counterintuitive (you're removing healthy plants!) but essential for the survivors to thrive.
How to thin:
- Wait until seedlings have their first true leaves (the second set of leaves that appear, which look like miniature versions of the mature plant's leaves)
- Identify the strongest, most upright seedling in each cell
- Use small scissors to snip the others at soil level — don't pull them out, which can disturb the keeper's roots
- One seedling per cell, per pot
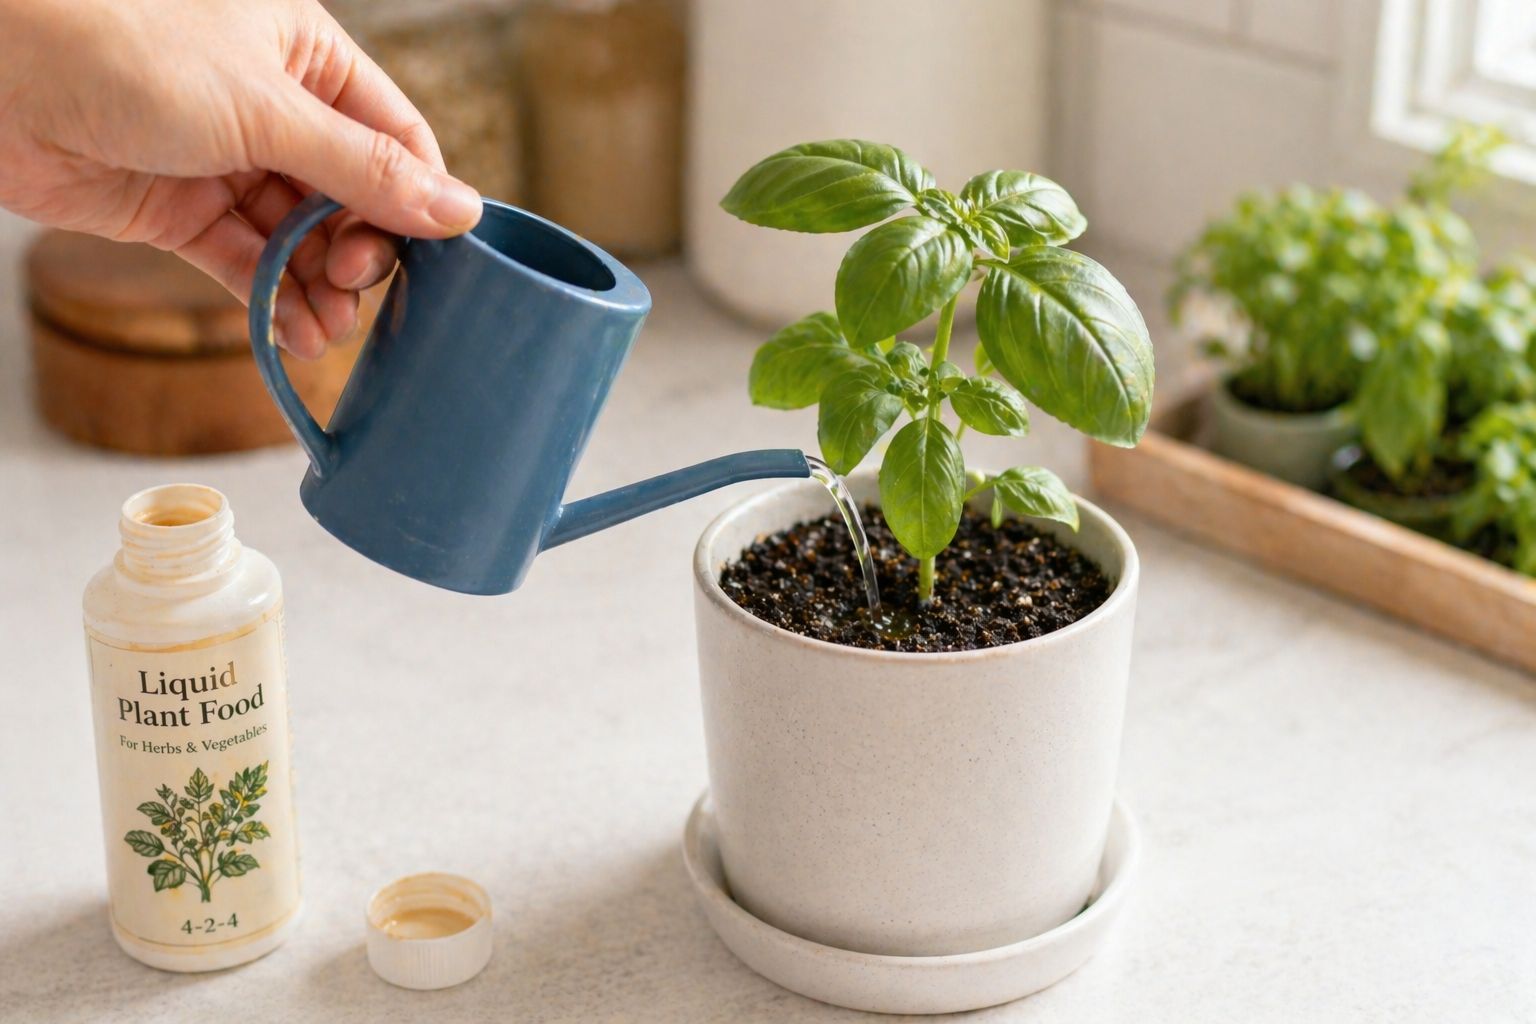
Step 8: Fertilizing for the First Time
Remember: seed starting mix has no nutrients. Your seedlings have been living off the food stored inside the seed — but that supply runs out around the time the first true leaves appear.
When to start fertilizing: Once the first true leaves are fully open.
What to use: A liquid fertilizer diluted to half the recommended strength. Seedlings are sensitive — too much fertilizer causes "fertilizer burn."
How often: Once a week is plenty at this stage.
Look for fertilizers labeled:
- "Balanced" (equal NPK ratio like 10-10-10)
- "Seedling formula" or "starter fertilizer"
Step 9: Hardening Off (If Transplanting Outdoors)
If you're growing plants that will eventually live outside, they need to be gradually introduced to outdoor conditions — a process called hardening off.
Direct transition from the controlled indoor environment to wind, intense sun, and temperature fluctuations can shock and kill seedlings.
Two-week hardening schedule:
| Days | What to Do |
|---|---|
| 1–3 | Place outside in a sheltered, shaded spot for 1–2 hours. Bring inside. |
| 4–6 | Extend to 3–4 hours. Introduce some morning sun. |
| 7–9 | Leave outside for half the day, including a few hours of direct sun |
| 10–12 | Leave outside all day, bring in at night if frost possible |
| 13–14 | Leave outside overnight (if temperatures allow). Ready to transplant! |
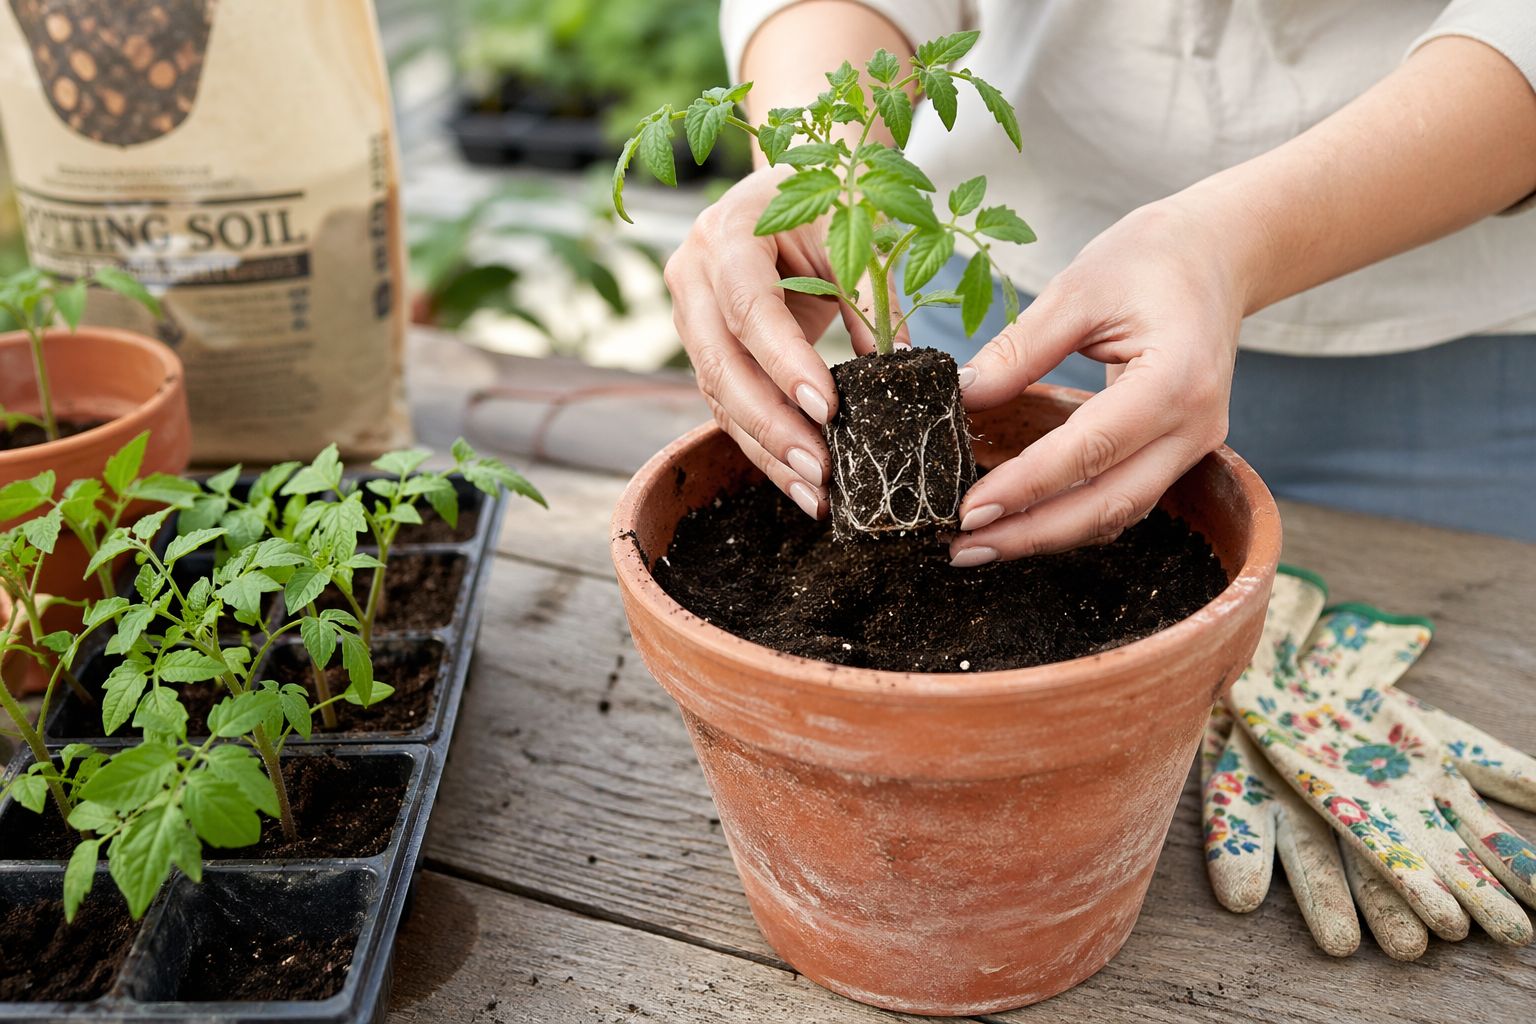
Step 10: Transplanting to a Larger Home
Your seedlings are ready to transplant when:
- They have 3–4 sets of true leaves
- Roots are beginning to emerge from the drainage holes
- The plant looks proportionally large for its container
How to Transplant:
- Choose a pot 1–2 inches larger in diameter — not too big (oversized pots hold excess moisture and can cause root rot)
- Fill the new pot halfway with regular potting mix (now you can switch from seed starting mix)
- Water your seedling an hour before transplanting — moist soil holds together better
- Gently squeeze the sides of the old container to loosen the root ball
- Lift the seedling by the root ball, never the stem
- Place in the new pot and fill in around the sides with potting mix
- Water thoroughly until it drains from the bottom
- Keep out of direct sun for 2–3 days while the plant adjusts
Common Problems & How to Fix Them
| Problem | Likely Cause | Solution |
|---|---|---|
| Seeds not germinating after 2 weeks | Too cold, too dry, or old seeds | Add heat mat, keep moist, use fresh seeds |
| Leggy, tall, thin seedlings | Not enough light | Move closer to light source or add grow light |
| Seedlings falling over at base | Damping off (fungal) | Improve air circulation, reduce surface moisture, use bottom watering |
| Yellow leaves | Overwatering or nutrient deficiency | Check soil moisture; start fertilizing if true leaves are present |
| White crust on soil surface | Mineral buildup from tap water | Use filtered or rainwater; flush soil periodically |
| Mold on soil | Too much moisture, poor airflow | Remove dome for longer periods; reduce misting |
Your First Seed-Growing Season: What to Expect
Here's a realistic timeline for a typical beginner indoor plant like basil or marigold:
Day 1       → Seeds sown, trays covered with dome
Day 5–7     → First sprouts appear (remove dome!)
Day 10–14   → First true leaves forming
Day 14–21   → Thinning complete, fertilizing begins
Day 30–45   → Ready for transplanting to final pot
Day 60+     → Mature, established plant
Don't be discouraged if things don't go perfectly the first time. Every gardener loses seeds to damping off, leggy growth, or a forgotten watering. The learning is in the doing.
Where to Find Beginner-Friendly Seeds & Grow Guides
If you're not sure which seeds to start with, or you want detailed, plant-specific growing instructions that go beyond what's printed on a seed packet — Seedora is built exactly for you.
Every seed listed in the Seedora catalog comes with:
- A beginner-to-advanced grow guide written specifically for indoor growing
- Germination timelines and success tips
- Recommended light, water, and soil conditions
- Common mistakes and how to avoid them
Whether you're looking for culinary herbs, tropical houseplants, flowering annuals, or vegetables for container growing — Seedora curates seed selections with first-time growers in mind.
🌿 Start your indoor seed journey at seedorastore.com
Quick-Reference Cheat Sheet
Use seed starting mix — not regular potting soil
Plant 2–3 seeds per cell, thin to 1 after sprouting
Keep warm (65–75°F) and covered until germination
Switch to bottom watering after seedlings emerge
Provide 14–16 hrs of light (grow light) or 6–8 hrs bright window
Fertilize at half strength once true leaves appear
Transplant when roots emerge from drainage holes
Harden off before moving plants outdoors
Final Thoughts
Growing plants from seed indoors is genuinely one of the most accessible and rewarding hobbies you can pick up. You don't need a garden. You don't need special skills. You just need a little patience, the right setup, and good seeds.
Start small — one or two varieties. Pay attention. Make adjustments. And before long, you'll have a home filled with plants you grew yourself, from the very beginning.
Happy growing. 🌱
Found this guide helpful? Share it with a friend who's been curious about growing plants at home — and explore our full seed collection and grow guides at seedorastore.com.
Tags: indoor gardening, grow from seed, beginner gardening, seed starting, houseplants, seedora, home gardening tips